


Why Proper Foil Insulation Installation Matters
Foil insulation is one of the most effective ways to improve energy efficiency in Australian homes. Whether you're looking to keep your space cool in summer or warm in winter, proper foil insulation can significantly reduce your energy bills. However, the key to reaping these benefits lies in correct installation.
At The Foam Company, we understand the science behind effective insulation. Our foilboard and accessories collection includes everything you need to get the job done right. This guide will walk you through the best practices, common mistakes to avoid, and tips for installing foil insulation efficiently and safely.
Foil insulation works by reflecting radiant heat rather than absorbing it. Unlike bulk insulation, which slows heat transfer, foil acts as a radiant barrier ideal for Australia’s varied climate. But even the best insulation materials from The Foam Company will underperform if not installed correctly.
Let’s explore step-by-step how to install foil insulation the right way for maximum comfort and savings.
Choosing the Right Foil Insulation for Your Project
The first step in a successful installation is selecting the appropriate type of foil insulation. Different projects call for different materials, and choosing the wrong one can compromise thermal efficiency and safety.
Types of Foil Insulation
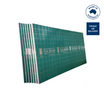
- Single-sided Foil: One side reflective, suitable for simple applications.
- Double-sided Foil: Reflects heat from both sides. Ideal for roofs, attics, and large walls.
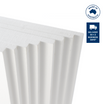
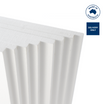
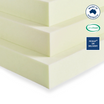
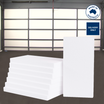
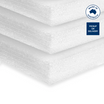
- Foil board Insulated Panels: Rigid panels with a reflective surface—easy to install and very durable. We recommend checking our full range of foilboard and accessories. Otherwise contact one of our Foam Consultants for assistance.
Consider R-Value and Climate
In Australia, especially in hotter regions, reflective insulation is most effective. However, combining it with bulk insulation increases performance. Always consider the R-value (resistance to heat flow) for your region and application.
Application Area
- Roofs and Attics: Use double-sided foil or foilboard panels.
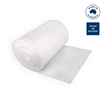
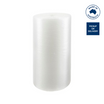
- Walls: Use foilboard sheets or foil rolls with battens.
- Floors: Reflective insulation under flooring can reduce heat loss.
Quality and Certification
Always opt for certified products that meet Australian standards. At The Foam Company, our insulation solutions are rigorously tested to ensure safety and performance.
Preparing for Installation: What You’ll Need and Pre-checks
Before you start the installation process, proper preparation ensures the job goes smoothly and safely.
Tools and Materials
- Measuring tape
- Utility knife or scissors
- Staple gun
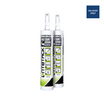
- Aluminium foil tape
- Safety gear (gloves, mask, eye protection)
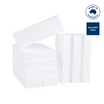
- Foilboard insulation panels and accessories
Safety First
- Work in well-ventilated areas.
- Shut off electrical circuits if working near wiring.
- Wear protective gear to avoid irritation.
Site Inspection
- Check for moisture: Wet areas can reduce insulation effectiveness.
- Inspect surfaces: They should be clean, dry, and structurally sound.
- Locate obstructions: Pipes, vents, or wiring may need special handling.
Step-by-Step Guide to Installing Foil Insulation
Here’s a general step-by-step process to help you install foil insulation effectively.
Step 1: Measure the Area
Use a measuring tape to determine the length and width of the space. Add a small allowance for overlaps.
Step 2: Cut the Foil Insulation
Lay the foil on a flat surface and use a sharp utility knife for clean cuts. Refer to product guides from The Foam Company for accurate cutting recommendations.
Step 3: Position the Foil
Ensure the reflective side faces the radiant heat source (e.g., sun-facing roof).
- Leave a 20–25 mm air gap between the foil and the structure for maximum reflectivity.
- Install horizontal or vertical depending on the structure.
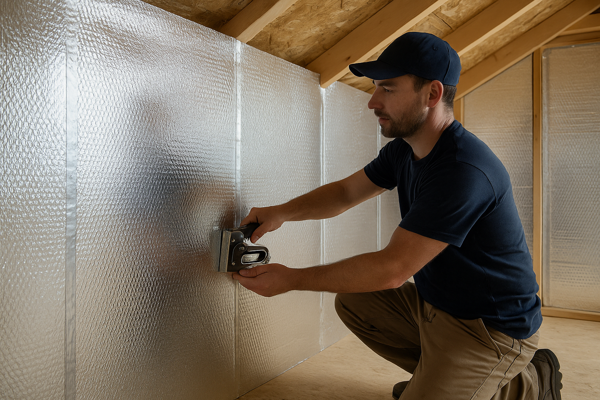
Step 4: Fixing the Foil
Use a staple gun to attach the foil to wall studs, ceiling rafters, or floor joists.
- Staple every 10–15 cm for secure attachment.
- Avoid overstretching the foil.
Step 5: Seal the Joints
Use aluminium foil tape to seal overlaps and edges. This step is essential to maintain thermal integrity.
Installing Foil Insulation in Roofs and Attics: Key Techniques for Maximum Efficiency
Roof and attic spaces are critical areas for insulation because heat loss or gain through the roof can significantly affect your home’s comfort and energy costs. Installing foil insulation in these spaces helps reflect radiant heat away during hot Australian summers and retain warmth in cooler months.
Visit The Foam Company to explore premium products designed specifically for roof and attic insulation.
Step-by-Step Tips:
- Clean the area and repair any leaks.
- Position the foil with the reflective side facing the roof sheet.
- Staple foil insulation along rafters.
- Leave an air gap for reflectivity.
- Seal with foil tape to cover overlaps.
- Do not block ventilation vents.
For DIYers, our foilboard accessories can help streamline roof installations with pre-cut panels, joining tape, and more.
Sealing and Maintaining Your Foil Insulation for Long-Term Performance
Correct sealing and regular maintenance are crucial to preserving insulation performance.
Sealing Tips:
- Use high-quality foil tape from our accessories range.
- Seal all overlaps and joints.
- Cover staple lines.
Maintenance Tips:
- Inspect annually for damage, moisture, or sagging.
- Replace or tape damaged areas.
- Avoid compressing foil when doing other construction.
Regular inspections and sealing ensure long-term thermal performance. Visit The Foam Company for maintenance-friendly insulation solutions.
Combining Foil Insulation with Other Insulation Types for Enhanced Results
For maximum efficiency, consider combining foil insulation with bulk materials like fiberglass or foam.
Benefits:
- Better temperature control.
- Reduced energy bills.
- Enhanced indoor comfort.
Common Combinations:
- Foil + Fiberglass Batts
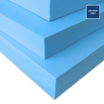
- Foil + EPS or Polyurethane Boards
- Foil + Spray Foam
Always leave an air gap when combining insulation types. Our foilboard and accessories make it easier to integrate multiple insulation types in one project.
Troubleshooting Common Issues When Installing Foil Insulation
Common Problems:
- Wrinkling or sagging: Avoid overstretching and staple correctly.
- Unsealed joints: Always use foil tape.
- Gaps or missed spots: Patch with leftover foilboard.
- Moisture issues: Ensure good ventilation and vapor barriers.
- Punctures from trades: Inspect and repair with foil tape.
If you're unsure how to fix an issue, contact The Foam Company for expert guidance or product support.
Conclusion
Achieve Optimal Home Comfort with Proper Foil Insulation Installation
Installing foil insulation the right way ensures you get the full benefits of energy efficiency, comfort, and reduced power bills. From choosing quality products like our foilboard panels to following correct installation methods, sealing, and maintenance, every step matters.
At The Foam Company, we offer premium insulation solutions, expert advice, and all the accessories you need. Get started today with confidence explore our full range and transform your home into a more comfortable, cost-effective space.
Leave a comment
This site is protected by hCaptcha and the hCaptcha Privacy Policy and Terms of Service apply.